Getting started with Unicorn Dashboard
Note
This section is still under work
Register and Login
Login
- Click the <Log in> button .
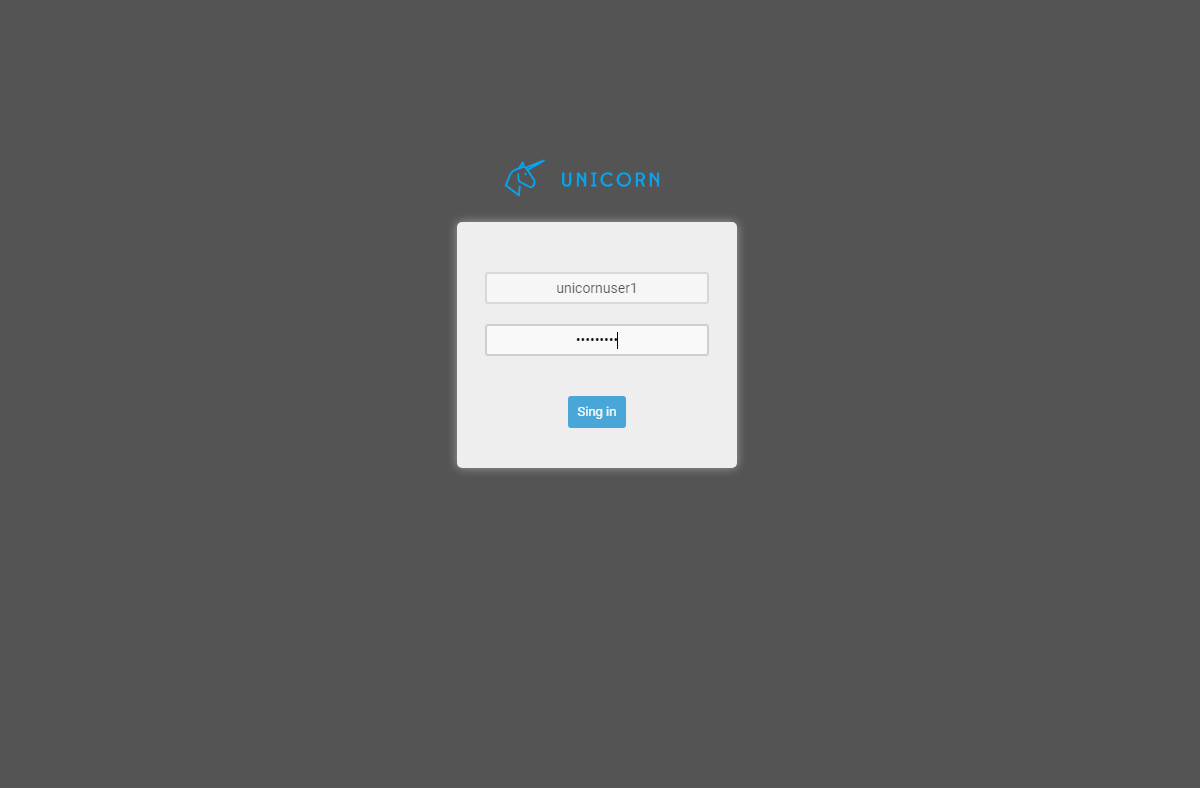
- Provide your login credentials and click the <SIGN IN> button.
- Upon successful authentication the following screen will be presented.
Logout
- In order to perform logout click the <Log-out > Button.

- Upon successful logout the following screen will be presented.
Create Users
Note
This section is still under work
- Visit the Unicorn Platform Unicorn Platform Webpage
- When a user access the Unicorn the following screen is shown:
- Click on login button.
- Click on “Create Account” button.
- Provide account information and click on “CREATE ACCOUNT” button.
- Go to your email and click on Unicorn account information link.
- You have successfully Created an New Account.
Dashboard Main View
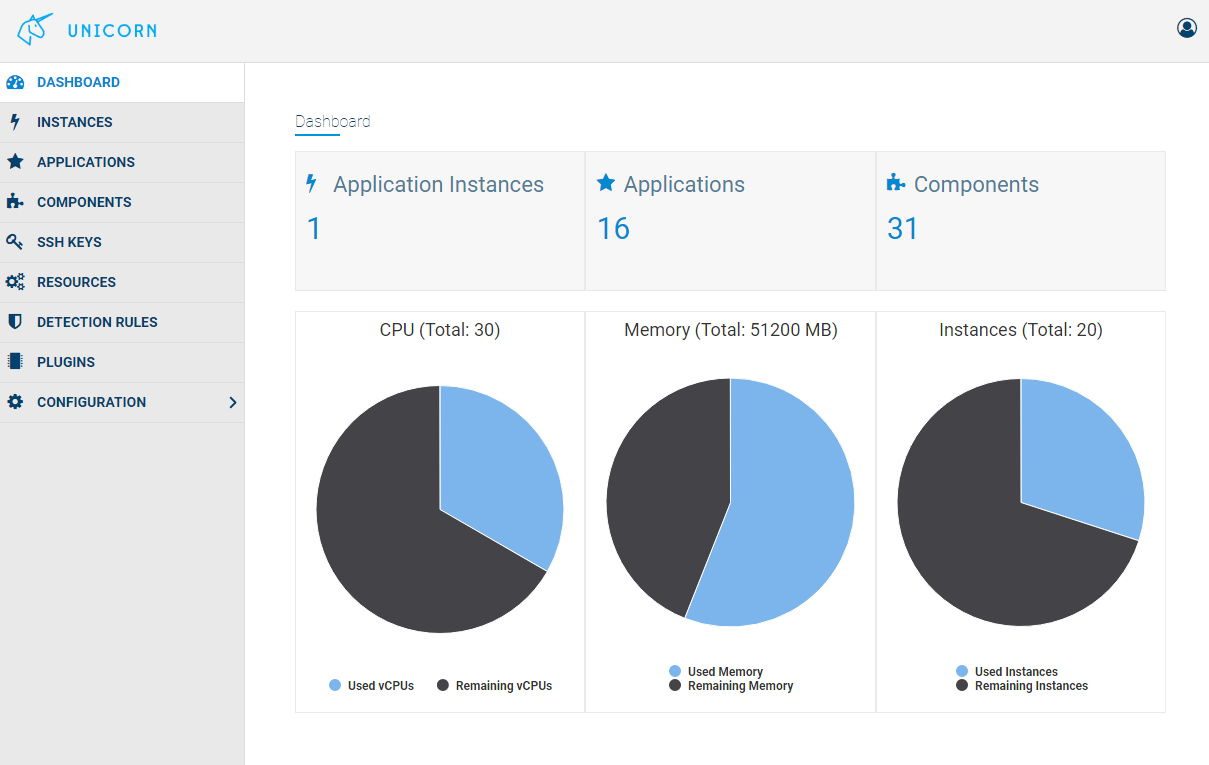
- Through the dashboard, an overview of the components, applications and deployed application instance is provided.
- In UNICORN, applications are described as microservices composed by smaller components.
- Also, an overview of the available and used, aggregated cloud resources of the user is provided.
Application Elasticity
- From the application instance list, the user must select the “Elasticity Policies” option for the deployed application, in order to configure how the application scales.
- By selecting the appropriate function, user can to aggregate the monitoring results in various ways.
- For the monitored parameter we select the metric and it’s dimension from appropriate lists.
- An operand shall be added to the policy and the threshold that the policy shall confirm to.
- The period field is used to set the size of the time window that the metric values are collected and aggregated for the policy enforcement.
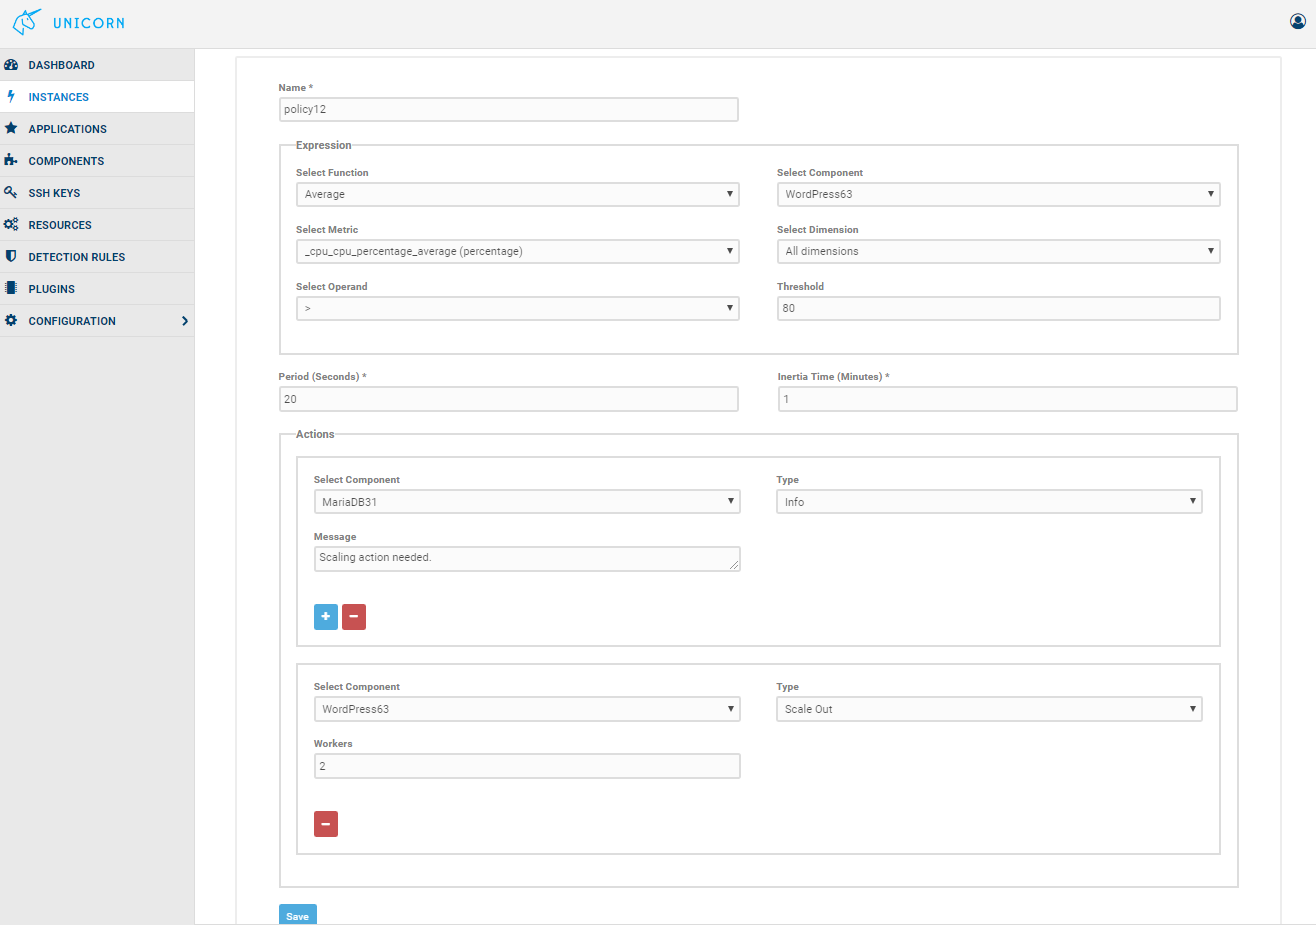
- On the scaling action we can select the component to scale in or scale out, and the number of workers to scale.
- After a scaling action is performed, some time is needed for having the component workers deployed. For this reason we should ensure that for this period we don’t fire additional scaling actions.
- This is done through the “Inertia” field that is used to define the time in minutes that after a scaling action is done,no further action is performed.
- Multiple scaling actions can be added.
- The policy can be saved and will be enforced to the application within few seconds.
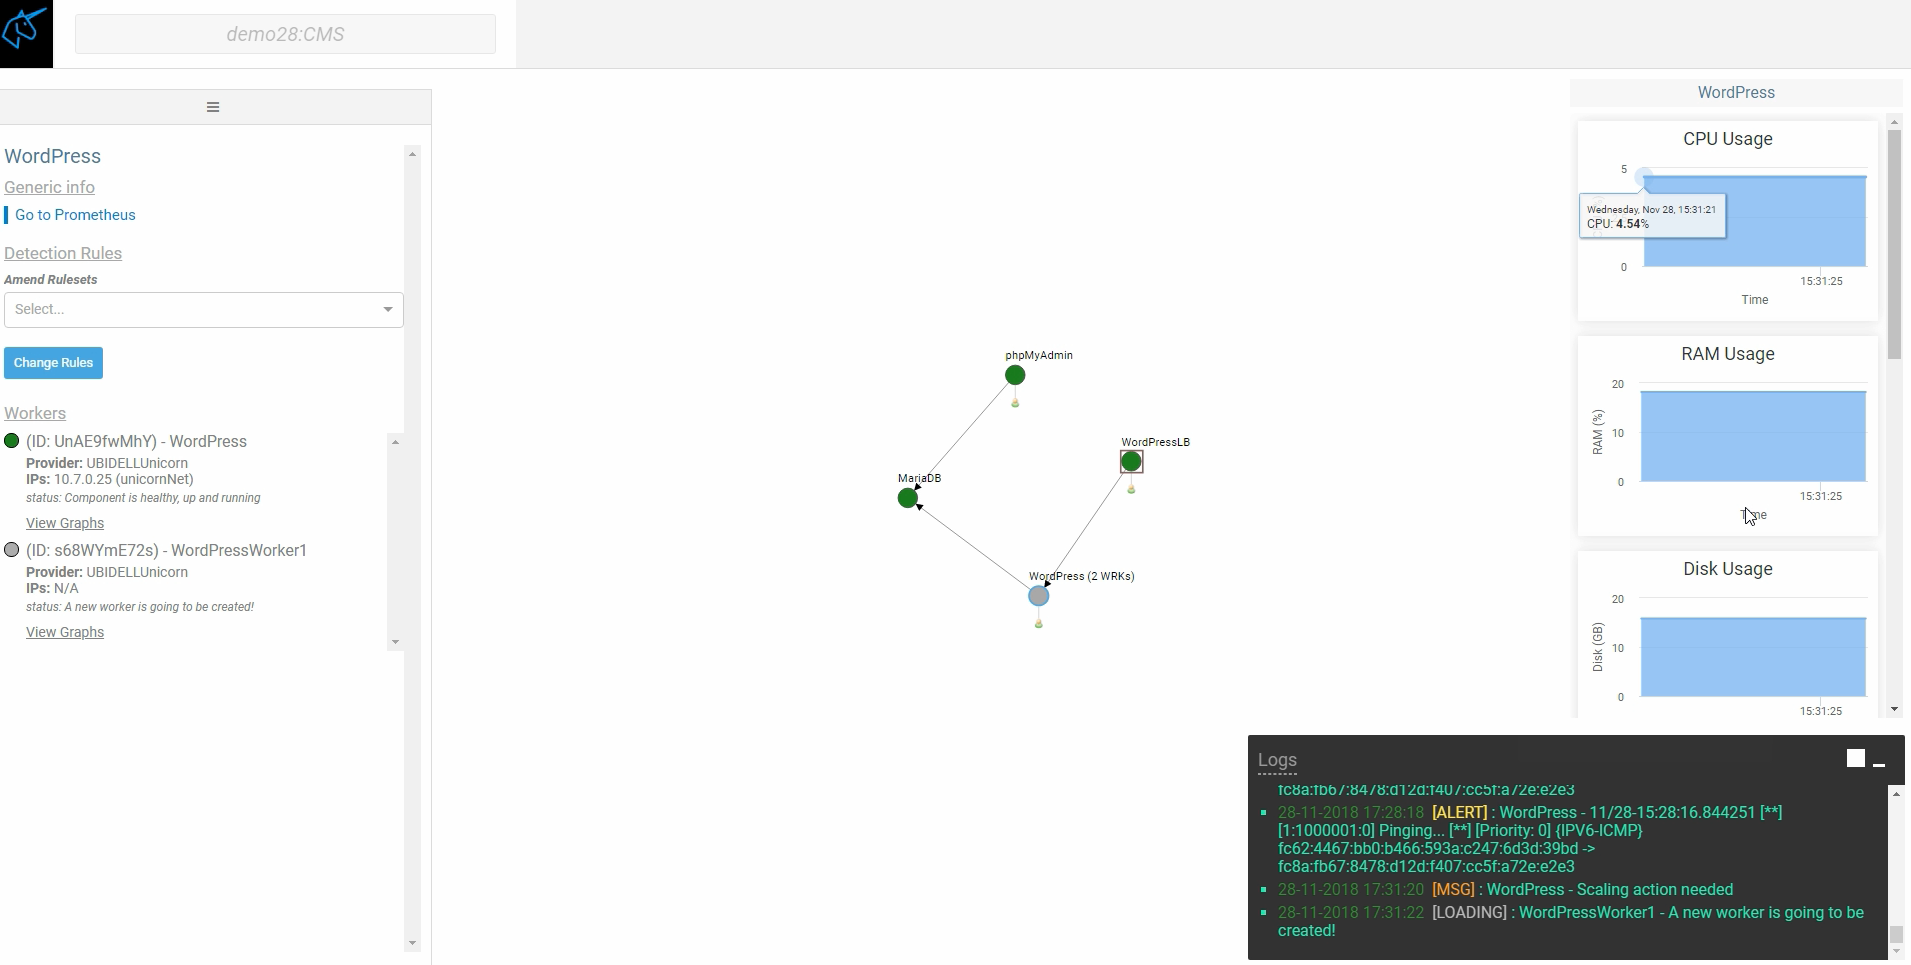
- In this example we had initially only one worker of the WordPress component.
- But due to the scaling rule, an additional node has been created.
- A load balancer had been already deployed from the initial deployment since we had defined that this component might need multiple workers.
- The scaling action is visible to the user through the logs and the number on workers in the “WordPress” node in the graphs.